![[Homemade Soaps Drying on Racks]](soap/Soap2.JPEG)
"Traditional Methods"
Working from Old Lye Company Instructions
With additional notes by Kathy Miller
|
|
"Traditional Methods" Working from Old Lye Company Instructions With additional notes by Kathy Miller
|
![]()
|
The foundation of the following information is a pamphlet from the old Pennwalt Corporation...who manufactured Lewis Lye in the 70's....I have added notes in blue text if I feel that there is another source or easier way. Since first posting this page, I have changed the way I make soap. I no longer hand stir but use the stick blender. To read about those steps, go to Modern Soapmaking Procedures. ..Kathy Miller Contents of this page (click on title if you wish to go directly to that subject).
|
|
![]()
NOTE (September 2005): After
receiving a couple of emails, I've finally come to believe
that it's true... the company that markets Lewis Red Devil
Lye has pulled it from the market and has
replaced it with a liquid drain opener that contains no lye.
My suspicions are that it's due to its use in the illegal
manufacture of methamphetamines. This is very sad for the
home soaper! :-( I've been buying my lye in bulk for quite
awhile now, but for the average person that wants to make
one or two batches and has gotten accustomed to buying it
locally... this will need to be addressed. Here is a helpful
link sent by Nancy M., whose email comment is
underneath: http://candleandsoap.about.com/od/coldprocesssoapmaking/a/lyesources.htm When I bought the two remaining
containers from the local Albertsons, I was told it's
popular in this community in the production of meth. When I
mentioned it to a clerk at the JoAnn's fabric store, where I
was fruitlessly trying to find any kind of other soapmaking
stuff, I found out she's a soapmaker and that she got her
lye at the local Grocery Outlet, in bulk. They don't have it
out where anybody can see it, but if you ask and show ID,
you can buy it. Graphic courtesy of About.com from
IMPORTANT NOTICE ABOUT RED DEVIL
LYE IN THE U.S.!
Anyway, I'm having fun, that's the point and thanks again
for all of your help :-)
Nancy M.
from the dry side, Clarkston, Washington
![[No more lye!]](soap/reddevillye.jpg)
Soapmaking
article by David Fisher![]()
USA Today...
The "Miller's Homemade Soap Information" page received mention at the end of an article in USA Today that ran from July 9-12, 1999. I have received permission to post the article since it was taken off the USA Today site. While it is old, much of the information is still helpful to novices. You can now view it by clicking here.
![[Sage, Sweetgrass & Cedar Soap]](soap/SpSageSGCedar.jpg) |
![[Cool Water Soap]](soap/SpCoolWater.JPEG) |
![[Candy Cane Soap]](soap/SpCandyCane.jpg) |
![[Oatmeal Soap]](soap/SpOatmeal.jpg) |
![]()
1. Never use lye on aluminum utensils (lye acts upon them). For small batches of soap, enameled or granite ware is suitable and for larger batches, an iron kettle may be used. (See insert below for comments on utensils.)
|
Special Utensils? - I've read in so many places that you should have special pans and tools for making soap that I just had to put in my two-cents worth here! I have never set aside my kettles, bowls, pitchers or stainless steel utensils only for soapmaking...it would seem silly to me. A wooden spoon is a different case. Wood is absorbent and you could never wash out all the junk in the wood after using it on soap (kind of makes you wonder how sanitary it is for other things as well!). If you are stirring with a wooden spoon, then by all means label it for soap and use it for nothing else. I use my regular beaters for soap, and everything else is used for other cooking purposes as well. Lye is not going to absorb into your stainless steel, plastic and glass containers (if it was that tricky, it would absorb its way right through the plastic container you buy it in)! Just wipe them out well (if there's raw soap in or on them... toss that into the trash to save your pipes from the grease) and wash with hot soapy water and rinse with hot water...just like you would any other dish. That's it. I don't know why we carry our respect for lye into paranoia, but I suspect we run a greater risk from eating off dishes that come out of our dishwasher, than to use our soapmaking utensils for cooking purposes! Enough said! Here's some feedback on wooden utensils I received after posting this:
You mention on your soap making page you wonder about the sanitary properties of wooden utensils in everyday cooking. You may be surprised to learn that it is better than metal or plastic! They did a study where they measured the bacteria counts on the surface of a butcher block table and the surface of a stainless steel table. They cleaned them identically, took measurements, then waited several hours and measured again. Almost all the bacteria on the butcher block table were dead. The amount of bacteria on the steel surface had multiplied many times. They determined that due to the inherent antibacterial properties of wood, it actually kills bacteria instead of allowing them to live in the pores as common sense would dictate. Thought you might like to know that perspective.
Knowing what lye can do to wood over time, I would still be quite reluctant to use my soapmaking spoon for cooking...blah! But, this was very interesting! Thanks! Of course, I don't know that any self-respecting bacteria would survive contact with lye for very long. My stainless steel pan that I use for dissolving the lye solution is the cleanest pan I have in the house! :-) An Update (Very Interesting... I find this easier to believe!):
I just wanted to let you know, for the sake of correctness, about the situation regarding wooden surfaces vs. plastic or steel. I read the post that you had on your website about the experiment where it was shown that bacteria multiplies better and faster on steel than wood. (I know that it wasn't your post, but it was on your page) I've been working in the food industry for about eleven years now, and I was intrigued when I heard about this study. Unfortunately, I learned very soon after that when some other researchers tried to duplicate the experiment, they got the opposite results. In fact, no one has ever gotten the results that the first researcher claimed to have gotten. Problem is, the new discovery gets front page, because it's fascinating, but the failure of the new discovery gets put somewhere in the middle of the paper. I don't think that anyone ever stopped cleaning their counters just because they were made of wood, but you never know. Best to have the facts. Yours truly, P.J. Buchan |
2. All grease should be pure and clean to obtain soap with a clean, wholesome odor.
3. Measure accurately. Be careful about temperatures.
4. Ammonia, kerosene, carbolic acid, etc., when added to soap help it little, if any, as the lye usually neutralizes them. They increase cost and may make soap harsh on skin.
5. Coldness makes a hard, brittle soap.
6. Excess lye makes a coarse, flinty soap that will crumble when shaved. Soap should have a smooth, velvety texture that curls when shaved. It should not bite the tongue when aged.
7. Use the all-purpose soap for toilet soap, a shampoo, for washing prints, lingerie, hose and other delicate fabrics.
8. The following fats (for soapmaking) are listed in the order of their desirability: Tallow, lard and their combinations, olive oil, other vegetable oils. Mineral oils will not make soap.
9. Poultry fat should be combined with other fats, as soap made from it alone is soft and spongy.
10. Aging always improves soap. Soap made from lard or soap that has been boiled requires longer aging before it becomes hard and ready for use.
11. Instead of storing rinds and meats scraps, extract the fat; store in a tightly covered container in a cool, dry place.
12. Make the fat into soap as it accumulates and let the soap age rather than allow the fat to get too old and rancid.
13. There need never be a failure in soapmaking. If separation occurs, it can be reclaimed.
14. Where you find your grease has become rancid or contains materials other than fats, boil in large quantity of water, allow to cool, skim off grease, and then follow the directions in the recipe for soapmaking.
You must have fat or grease to make soap; it cannot be made from lean meat scraps. Tallow and lard make the best soap. Fats that have no cooking value, such as meat fryings, cracklings, meat trimmings and other refuse fat can be used. Certain vegetable oils are sometimes used. (*More about vegetable soaps on the All-Vegetable Page.) Mineral oil or mineral grease will not make soap.
Good soap requires fats that are free from dirt, rancidity, lean meat, salt and other impurities. Fats may be grouped in three classes:
1. Fat rendered from tallows, meat trimmings, rinds and other meat scraps. This fat is ready for soap.
2. Meat fryings and other refuse fats. This class of fat should be washed as follows: Add an equal amount of water and bring it to the boiling point. Remove from fire, stir, add cold water (1 qt. to 1 gal. of the hot liquid). The cold water precipitates foreign substances. The clean fat comes to the top. Remove the fat when firm. Note: Some fats require a second washing. Wash a very rancid fat at least twice.
3. Cracklings. For pressed cracklings remove fat as follows: To every four pounds or one gallon of pressed cracklings, add one level tablespoon of lye, and water to twice the depth of the cracklings. Cover and boil one hour. Remove from fire and when it stops boiling pour cold water over it and proceed as in 2 above. Treat unpressed cracklings the same as pressed cracklings, except use one level teaspoon of lye instead of one tablespoon to four pounds of cracklings. Note: Sixteen pounds of cracklings - (approximately four gallons) can be boiled at one time. Remove fat from the cracklings after butchering and store until ready.
Compiler's Note: The above sounds pretty messy and is. I usually have bought pure fat from the butcher or have friends that have given me their lard/tallow after purchasing sides of meat. If you order fat from a local butcher, be sure to get beef kidney fat. You might have to buy a certain quantity for him to order (I ordered 40 pounds last time and paid approximately 50 cents per pound, but it renders out almost 95% and is a great buy). The easiest rendering method for me is to cut the fat up into chunks and melt it down in my microwave oven. I use a covered heat-proof casserole dish for this purpose and after the cracklings are getting brown and are shrinking toward the center (but not burning yet!), I lift them out and pour the fat through a sieve. This method allows you to render what you need and do smaller batches without tying up your kitchen for the whole day (such as using the stove method or in the oven). It smells, for sure, but it's easier to deal with the leftover scraps for me when they are all crispy than to have to pull them out of a pot of water when they look pretty disgusting! If you don't have a source for lard (pig fat) you can buy that ready-to-go at many grocery stores in the baking section or possibly in the dairy case.
*Here's a rendering tip from a fellow soaper:
|
I have a helpful hint for your web readers. I have a hard time rendering tallow. The smell often makes me very ill. So when I go to press the tallow or work with it in any way I put a small amount of Vicks Vapor Rub under my nose and I don't smell the tallow at all. It really does work. Hope this will help some of your readers. -Ronnett Crafton |
Do you need METRIC measures? (Links updated July 2020) Check out this conversion tool at The Sage (old Majestic Mountain Sage): Measurements Conversion Calculator. You type in the measurements, hit the button and it will convert them for you.
All recipes are based on WEIGHTS, not volume. You will need to weigh oils and lye with a good scale. Water can be measured with a liquid measuring cup with no problems.
To make 9 pounds of pure, hard, smooth soap suitable for toilet, laundry or soap flakes, follow this simple recipe:
Dissolve lye in cold water (never use an aluminum container...you can use stainless steel or heat resistant glass like Pyrex). Stir until dissolved and let cool (your previously cold water will become very HOT in a matter of seconds after stirring in the lye) to correct temperature (temperature chart is below). Melt fat to clear liquid and let cool gradually to correct temperature or until the fat offers resistance to the spoon. Stir from time to time to prevent the crystals of fat reforming. Pour the lye solution into the fat in a thin, steady, stream with slow, even stirring. (Note: I've found that transferring the lye solution to a Rubbermaid plastic pitcher...with a pouring spout...makes this easy to control by myself. I mix the soap in a large stainless steel mixing bowl or spaghetti cooker (which is nicer because it is narrower and deeper) right on the stove where I melted the fat [with the burner OFF] and use a portable electric mixer for the first 10 minutes, after which I switch to a large spoon. If you are working in a cold room and your soap starts looking like the fat is setting up before saponification has really happened, you can turn the burner onto low briefly to warm the stuff up, if need be.) (Rapid addition of lye solution or hard stirring is liable to cause a separation.) A honey-like texture is formed which in about 10 or 20 minutes (for this recipe, in my experience, usually 20 to 30 minutes, but contrary to their instructions, faster blending is usually much better than doing it too slow. Using a stick blender has convinced me of that. If you're hand stirring, just don't get wild and splatter the stuff all over you and the stove!) becomes thick with all the lye incorporated into the fat. (If you are adding scent to your soap, this is the time to stir it in. When the soap is thick enough to "trace" or gently draw a line on the top of it with a spoon, it's time to stir in the scent. See further information under "Variations in Soapmaking." When the soap is close to being ready to pour, it will usually start looking duller on top and form a bit of a fine ring around the edges of the bowl or pan it's in. It should have a satin finish and smooth texture... not be terribly grainy. If your soap starts looking grainy too soon, apply some gentle bottom heat to the bowl for a minute or two while stirring until the graininess disappears... be sure to turn the burner OFF after that brief heating period.). Pour this mixture into a wooden box that has been soaked in water and lined with a *clean cotton cloth dipped in water and wrung nearly dry. Place in a protecting pan. Cover with a board or cardboard then with a rug or blanket to retain the heat while it is texturing out. Let it remain undisturbed for 24 hours - then cut and lift from mold.
*Compiler's Note: I tried the above and it's such a mess! I have found that a cat litter box (unused) makes a dandy mold for a full batch of cold method soap if you want it to be in a single layer. You can lightly oil it ahead with non-stick coating or a tiny bit of one of the fats you are using in your soap before pouring. For a deeper mold that places the bars on their sides or ends, you can use a cardboard box (or make your own out of wood) that is approximately 8" X 8" X 4" deep. This allows for 32 bars that are around 4 ounces each when using the recipes on this site (approx. 6# of fats). Put a piece of plastic wrap, freezer paper or saran on the bottom of whichever mold you use cross or lengthwise, being sure it is long enough to hang off the sides and is carefully pressed against the bottom and sides of the pan with all the wrinkles smoothed out. This will make taking the soap out of the pan SO much easier! I can't believe it took so many years of sometimes struggling to get the stuff to "drop" out of the pan for me to think of trying this! :-( I have gotten lazier the more soap I've made and now put two pieces of trimmed freezer paper perpendicular to each other and both hanging over the sides of the mold, where I tape them down. This allows a small amount of soap to escape into the corners of the box I use (below in the photo), but I don't have to take time to mitre corners. You can use one sheet if you mitre the corners, and be sure to put the coated side up (toward the raw soap). Note: If you pour into some sort of plastic mold other than food grade, you could have a problem with your soap becoming discolored after unmolding.
P.S. ... from a fellow soaper...
Thanks for much for your website! I made my first batch this weekend, using "Rachael's Tried and True" recipe (and a stick blender), and it was a complete success. There was one part of the process that caused me a few anxious moments, and I wanted to share it other "first-timers:" I poured the traced soap into my shoebox mold, wrapped it in a towel for insulation, and then peeked after about 15 minutes. The soap appeared to be hardening. I peeked again after 30 minutes or so (patience is not one of my natural traits) and there was a dark, gel-looking spot in the middle of the mold which spread before my eyes to cover the entire box of soap. I thought I had ruined it all. I did notice that there was quite a bit of heat coming from the soap, so I removed the towel, opened the lid, and let the heat escape. Convinced that my first attempt was not so good, I went to bed. When I went down in the morning, there was my beautiful, hardened soap.
After a bit more reading, I think what I saw was the "GEL STAGE" you refer to in a couple of places. Somehow, I had missed reading about that stage on the first pass.
In your directions for beginners, could you pass along a little more detail on this stage... in case anyone else peeks!
Thanks again for a wonderful website. -Leanne Frank
I just did! :-)
Note: Jan. '98 - Some of you may already have tried this, but I read a great suggestion in a soap-digest this month and have tried it. It involves lining your soap mold (we're talking a rectangular type here, like a box or storage container) with pieces of mylar. This material is used by quilters and can be bought in sheets at a fabric store (I paid about $2.30 each and used a little more than one sheet). They had two thicknesses and after studying it for awhile, I went for the thinner slick ones. They are less rigid, but could be cut in my rotary blade paper cutter. Also, we thought the frosted finish of the thicker mylar might stick more to the soap...don't know.
|
|
Anyway...you cut pieces for the bottom and sides (I labeled them with marker since the box I was lining was not perfectly square) and also the top if you like. To use them, you line your mold with a piece of plastic wrap or plastic bag, then put your mylar pieces in place over the plastic. Makes a nice smooth edge on the soap and you can wash and reuse the plastic pieces...no mitering of freezer wrap every time. The soap should easily lift out with the plastic around the whole thing. The picture to the left is to show you what I tried. Sorry this soap is uncolored and very boring! :-) The sides came out nice and smooth and the top almost, but you can see there are a few low spots that will need some trimming. The thicker more rigid mylar might be nicer, or turning these pieces the other way so that they don't want to curve in at the corners. It's an option if you like...freezer paper works well also.
|
As long as you have out the plastic wrap, I'll pass on that some people put it on TOP of the soap also to prevent it from forming ash. You can release air bubbles by gently poking it with a needle.I have not yet done this myself, but I'm told that after the soap sets, it will peel off easily. You might have a few wrinkles left behind, but maybe the trade off will be worth it if you've had much trouble with ash forming on top of your soap. Some batches are terrible for this, but most are not too bad. I think I'd make sure the soap was a little thicker before placing the plastic...a bit beyond the pudding stage.
To remove the soap from the mold, lift it by the ends of the overhanging cotton (saran or freezer paper) lining. Cut into bars by wrapping the soap once with a fine wire or string (dental floss is good), crossing ends and pulling. Place soap so air can reach it, but avoid drafts and cold. Soap protected from drafts and cold lathers better. In 10-14 days it is ready for use. Actually, I would recommend aging it for a month before trying it...sometimes six weeks. Aging improves soap.
Note: Do not let soap freeze during the first two weeks. (Lately, I've often read the suggestion to put your molded soaps into the freezer for about an hour if they are stubborn about popping out of the molds...contradicts this warning.)
Compiler's Note: I mark lines for soap bars the back of the large slab of soap using a straight edge and knife and then either cut the bars with a thin-bladed sharp knife, if the soap is soft and smooth, or a piece of dental floss, pulled taught between your hands, if it's more brittle or mealy/crumbly. If cutting with floss, it helps a lot to have someone hold the slab of soap on edge while you make the first few cuts to separate the "rows" of soap bars. Then you can cut the long strips apart yourself by setting each piece on edge and cutting down from the top. It's a good idea to put something on the table like plastic or waxed paper wrap not just to protect the table, but to make it easier to pick up that large piece for cutting! You can lift one of the ends of the plastic to get your hand underneath. If your soap is smooth enough to cut with a knife (lucky you!) you can just leave it flat on the table where you marked it and carefully draw the knife from back to front, sighting on the lines that you scored. After separating the rows, you handle it like above, by setting each one on edge and cutting down on the lines to separate the individual bars. To test for brittleness before cutting I just make a tiny cut toward the edge on one of the lines and see how the soap responds. Sometimes this is not necessary, because the soap came out of the pan in pieces and it's obvious that it's BRITTLE! :-)
In the case of a deeper mold, like the box I've been using lately: After removing the piece of soap from the box, I make light scored lines (using the ruler to make dividing marks and then as a straight edge to get straight lines), dividing it into four rows and then making bar lines across all, approximately 1 inch apart...a total of 32 bars from the box I'm using (roughly 8" X 8" x 4"...I rounded off...mine is a bit wider and shallower). Once I've used a ruler and knife tip to draw the lines, I set the piece on edge and cut the four rows apart. Then I take each row and turn it sideways (with this mold that works better) and cut each of the bars off, sighting on the line I drew, which is now on the front and looking at my knife position from above to make sure it looks straight and even before pushing it down. They are not perfectly square and usually need a little trimming on the top side to even out, but aren't too bad. Update... see photos and descriptions on the Modern Soapmaking Procedures page for how to cut soap with a miter box.
To cure, I usually set the bars on edge in rows in the litter pan the soap had been poured into since racks take up a lot of space (or if not using a litter pan, a low carboard box lined with a piece of freezer paper makes a good curing place). If I've poured some of the soap into molds (which I always do...as many as I can without the bars from the litter box being too shallow...usually about 16 molded soaps of the sizes that I have) I put them on racks to dry after unmolding since you can't really set them on edge. If they are stubborn about coming out after 24 hours, just let them set another day or two and they should pop out without too much difficulty.
|
After another day, I sit in a comfortable spot with the soap bars, a potato peeler and a bowl and bevel the edges of each bar. Some people prefer to use a cheese slicer instead of a potato peeler. It would certainly do a smoother job on the large flat face of the bars (for anyone else but me...tried it and went back to the peeler!). At this time you can even out rough spots on the sides or shave off *ash, which some batches will develop more than others. (If it's going to, it generally forms on the surfaces that have contact with air while the soap is setting.) The shavings can be sprinkled lightly with water and shaped into soap balls after mixing and kneading the soap. The bars that have been beveled are left out in open air to cure and I turn them a couple of times during cure until they have finished "drying" out and hardening. After about two to three weeks, they can be stored in in a less open situation. ***What I now do, since I first posted this page, is to put the soaps into a plastic storage unit I bought at Costco (less than $30 at the time). It has nine plastic drawers and rolls around on casters. I can crack the drawers open an inch or two if the soap is not fully cured to allow some air circulation, but not total open air. One batch fits nicely in each drawer (28 bars). Once the soap gets to be pretty hard (maybe after six weeks), the drawers can be closed... they are not totally air tight. I found that some batches would weep over time if I stored them in plastic... especially during the first 6 weeks. Might depend on the recipe and weather conditions... not certain.
|
![[Beveling]](soap/Beveling.JPEG)
Isn't that an ugly peeler? I've put a lot of miles on that thing! The soap is an all-vegetable one called "Zesty Calendula." Recipe is on the All-Vegetable page. |
*ASH - It has been suggested that using some beeswax in the recipe in place of some of the fat will prevent ash from forming, or that soaps made with beeswax will not ash. I have not tried this yet, but if you would like to do it, I would suggest substituting 4 ounces of beeswax for 2 ounces of a fat in the original recipe. Some people have success with placing Saran Wrap on top of the soap after it's poured. Release air bubbles by gently poking it with a needle.I have not yet done this, but I'm told that after the soap sets for 24 hours, the plastic will peel off easily. If you use some sort of plastic other than food grade, you could have a problem with your soap becoming discolored after unmolding.
A third suggestion I recently read about on a soaplist was to put your freshly poured soap mold into the oven with a pan of water and the light left on (NO heat...only the light). Be sure to put a sign on the door so that no one (including yourself) turns it on! The water provides humidity while the light provides gentle heat. No need for blankets and such this way.
Yet another! :-) NEW! Sorry it's taken me so long to post this... it was sent in the spring of 2005...
Subject: Iben's NO ASH Method
Hi Kathy
This is Iben from Denmark again :-)
I recently developed a method to make ash free soap. Knowing how many soapers around the world who have ash problems, I figured that I would post the method on different soaping boards so that as many soapers as possible could enjoy making ash free soaps. I know that lots and lots of people visits your supreme website, so I was hoping that you would be willing to upload the instructions?
I like to decorate my soaps with botanicals but if you have a layer of ash on top and you use e.g. dried slices of lemon you have to sit with a knife and to remove the ash. I soap for a living so I simply don't have time for that.
The method is simple (which is why I like it). All you need is a spray bottle with a strong alcohol (I use 96%).
Make your CP soap as usual, stir it to a medium/thick trace and pour it. Spray the top of the soap evenly with the alcohol, wait a while until the alcohol has evaporated and spray again (it won't take long, strong alcohol on a hot surface vanishes quickly). You need to repeat this procedure a couple of times. You can stop when the top of the soap has developed a thin shiny layer. This layer has the same structure as the top of a MP soap (it is MP soap). When you are done, wrap your soap in blankets and keep it warm like usual.
My average batch is between 80 - 200 kg so placing my soap in the freezer to avoid a gel is out of the question. All my soaps obtain a full gel and I haven't tried this method on soap which doesn't.
This is what happens
Alcohol works as a solvent and by spraying the top of the soap you dissolve any possible ash layer and get a thin layer of MP instead - very shiny and pretty.
Working with botanicals
Place your slices of lemon, rosebuds or whatever on the fresh poured soap. Spray the soap with alcohol afterwards as described above.
Kind Regards, -Iben
(*Note for text browsers: Fat Temperature listed first, Lye Solution second.)
Types of Fat |
Temperature of Fats |
Temp. of Lye Solution |
|
Sweet rancid fat |
97� to 100� F. |
75� to 80� F. |
|
Sweet lard or other soft fats |
80� to 85� F. |
70� to 75� F. |
|
Half lard and half tallow |
100� to 110� F. |
80� to 85� F. |
|
All tallow |
120� to 130� F. |
90� to 95� F. |
|
Vegetable Fats |
100 � to 110� F. |
90� to 95� F. |
Correct temperatures are extremely important for making the finest soap. Follow these temperatures closely. Use a dairy or floating thermometer.
In hot weather or in a hot room if the soap mixture remains greasy, set it in a pan of cold water and continue stirring until thick, when it is ready to pour. If temperatures are too low, lumps of soap will form and separation will occur. In that case, set the mixture in a pan of warm water and stir gently until it is of the right consistency, and all the lye is reincorporated.
Note: Avoid hardening of the mixture on the sides and bottom of the pan.
Compiler's Note: The above temperature chart was part of the original lye company information I used as a basis for this page. I tried to measure temperatures when I first started, and it didn't work that well for me. I used to think there needed to be a difference in the temperatures of the lye and the fats (the lye solution being slightly cooler), however, it doesn't have to be an exact science for the soap to turn out ... but if you want to be more scientific in your approach and have the same results each time, you may want to heed recommended temperatures to start (until you can do it by feel). Nowadays, I use the same temperature range for both fats and lye and personally prefer from 95 to 110 degrees.
You can just gauge the temperatures by putting your hand on the outsides of the containers. The softer the fat is at room temperature, the cooler it should feel to your hand before mixing it with the lye, but never actually cool. The coolest you would go with softer fats would be feeling lukewarm. With combined beef tallow and lard soaps, I start mixing it together when the fat feels (from the outside of the pan) toasty warm without a hint of being hot to the touch (leave your hand on for a few seconds). If the lye solution is still feeling too hot at this point (again...you don't put your finger in!), you can put the pan holding it in a sink half filled with cold water and stir it briefly. The temperature will come down quickly, so don't overdo it. You do NOT want to cool fat down in this way...you have to be patient and let it do it on its own with periodic stirring. If I mix the lye solution after just turning on the stove to melt the measured fat ingredients, they are usually ready about the same time (maybe in approximately 45 minutes to an hour?). Leaving a stainless steel spoon in the lye solution pan will tend to help it cool off faster, if that's an issue. The metal of the spoon will draw some of the heat out of the liquid.
If you want to use a thermometer to get a temperature reading... there is a range of acceptability... I usually strive for anywhere from 90 degrees (milk type soaps that want to overheat) to 110 degrees (regular soaps). Some folks like lower or higher. The temperature is not as critical as the above chart led me to believe! ;-)
If too cold or too hot a temperature is used or soap is too vigorously or not thoroughly mixed, a separation may occur (Nov. 28, 1998 - After becoming converted to using a stick blender to mix soap at high speeds and seeing how QUICKLY it saponifies...yipes!...I tend to think a separation is almost always more likely to happen when the soap is not mixed thoroughly enough and the fats get too cool before successful blending). A separation may also result from using exceedingly rancid fat, or fat containing salt. Greasy soap forms at the top while liquid settles at the bottom.
Compiler's Note: Unless your separation is severe (liquid on the bottom) don't do the following. Just let the soap sit longer before cutting. Small lye pockets in the soap will absorb with time and I've seen the grainiest and most terrible looking stuff turn out fine. It's not as nice to cut, however!
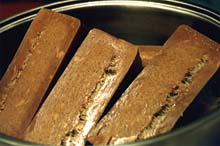
The fluorescent lighting makes this look pretty ghastly! It was an Oatmeal, Milk and Honey batch that looked fine, but left a puddle on the table when I cut the first rows apart. Clear oil seeped from these cavernous pockets. What was totally amazing, were the crystal "chains" that reached from top to bottom of the openings... like cave formations. This is caused by too much heat in the poured soap. Since milk and honey cause overheating in soap, you should drop your initial mixing temperatures down by at least 10 degrees (in the 90 degree range) and do not insulate the soap much if at all after pour. It's nice to have it gel... but NO hotter than that with a deep mold. |
![[Crystal Formations]](soap/SeparationClose.JPEG)
Robert (2nd son) got his camera and close-up lens, and snapped some photos of these things. Made me wish I were tiny and had a teeny hardhat. It was almost sad to me when I remelted it! I have heard from a few other folks who have had batches like this. You can read their emails on Botched Batches. |
When separation occurs, reclaim as below:
Cut or shave the soap into a kettle, add the lye that has separated out (never throw it away) and about five pints of water. (Frankly, I'd try 5 CUPS first, or better yet... only ONE cup and use one of the methods on the Rebatching Page!) Melt with gentle heat and occasional stirring. Then raise the heat and boil gently. It should become thick and syrupy. If it does not, add more water, one pint at a time, and continue boiling until it becomes ropy and hairy when dropped from the spoon. Pour into mold and cover.Note: Do not be afraid of adding too much water because it can be boiled off. When cutting soap, allow for some shrinkage, and cut them a bit larger than if the soap had not been reclaimed.
I don't think I would ever use the above method again! If you need to reclaim a separated batch, it would probably be much more satisfying to reclaim it in a slow oven in a covered container (non-aluminum). You can add one cup of water if the soap is particularly hard. Shave or break it up (or maybe just pour it in!) and put into a slow oven (around 170 degrees or the lowest setting you can get near there). Stir every so often until the soap ingredients melt and blend thoroughly and saponify...maybe about two hours for the whole process. Bring out of oven, allow to cool slightly (but don't let it get too thick), add any fragrance oils or organics and pour into molds. This method was suggested by Howard Lang of California and he writes of this on the "Soapy Success" Pages.
Compiler's Note: The above instructions for "reclaiming" soap from the lye company are not the same thing as "rebatching" or "remilling" ... the way many soapmakers choose to make their various types of soap after starting with a basic recipe. Rebatching involves grating the already finished basic soap and melting it with some water or milk and then adding the essential oils, colors, organic materials like spices, etc.before pouring into molds. This is usually done with one pound of shaved soap at a time. You can read more about this on the All-Vegetable Page and also find some great rebatching suggestions on the Rebatching, Remelting, Remilling, etc. page.
In addition to pure all-purpose soap, many other kinds of attractive and useful soap can be made in the home. The thrifty housewife may eliminate all soap and cleanser purchases and yet enjoy all the luxury and efficiency of dozens of types of soap.
Almost any type of soap can be made to float. When the soap mixture is thick enough, fold air into it as egg white would be folded into a cake mixture.
If perfumed soap is desired, the following oils are recommended, preferably the synthetic or imitation: Sassafras (4 tsp); Lavender (2 tsp.); Citronella (2 tsp.); Lemon (2 tsp.); Cloves (2 tsp.); Almond (3 tsp.) or Rose Geranium (1/2 tsp.).
Compiler's Note: Contrary to the above information, pure essential oils are generally more reliable in perfuming soap than the artificial ones (but tested fragrance oils can be excellent). You don't need as much though, and should consult other sources for the proper amounts to use with each batch of soap. It will vary, according to the strength of the particular oil concerned. Usually, anywhere from 1/2 to 1 ounce should be adequate to scent a batch of cold-method soap. When the soap is thick enough to "trace" or gently draw a line on the top of it with a spoon, it's time to stir in the scent.
Your druggist can supply or secure coloring ingredients for you. Never use perfumes or colors containing alcohol, they will fade and may cause separation.
A tea made with leaves of rose geranium gives a delightful perfume, and may be colored or not as you like by adding the extract of blossoms of pink roses or tulips. A green color can be had by pounding the tops of beets to extract a few drops of the juice and add in the water.
Compiler's Note: Any wax or oil based coloring agent can be used to color soap and candle dyes work very well. Just melt the dye chips or powder in a little bit (a few tablespoons will do) of fat and then mix it into your melted fat before adding the lye solution. The color at this point will be MUCH darker than when the soap is set, so some experimenting is sometimes necessary to figure out how much dye to use to get the desired shade. Some crayons work to color soap also, if you want to try those. I have heard concerns about them not being FDA approved for your skin, but lye isn't either and I figure if you can EAT the crayons, they probably aren't going to cause you any real problems in the amounts you will use in your soap. For more on coloring agents, see the Design Your Own Recipe Page. Powdered turmeric at the rate of 1/2 to 1 teaspoon per batch will give soap a nice natural creamy color and can also be used if that's what you'd like instead of plain white.
*** Some folks have asked me about candle colors and their safety, citing that they are not approved for cosmetic use by the FDA. This is true, but soap is not classified as a cosmetic (in the U.S.) and is not held to the same standards as a true cosmetic. The candle colors I use are in such low addition rates, and from what I've read, they are similar in nature to the colors used in hair dye. Since soap is not left on the skin and is immediately washed off, I've not worried a lot about this and have never noticed anyone having a reaction to candle colors. That's just my unofficial two cents worth... but I thought I'd share it, since folks have asked me. You can order cosmetic approved and "natural" colorants off the internet (like ultramarines and oxide powders). Many of those are actually synthetic, but seem more natural to some folks than candle color. You can choose what you want to do with your soap. I've tried any and all of them, depending on the effect I'm after.
All soap readily absorbs odors. It can be inexpensively perfumed by placing with it the leaves of a favorite flower or other perfume, if perfume has not been added previously. By supplying the perfume and coloring from the home garden, luxurious toilet soaps can be made at very low cost, saving several more dollars in the family budget.
Borax quickens the sudsing action of soap. Two tablespoons dissolved in the lye solution (for each can of lye) while cooling, is sufficient.
Compiler's Note: I never noticed a big difference in using borax, so abandoned this practice a long time ago. Using some coconut oil for some of the fat in the recipe will make your soap suds better, if that's important to you. A few ounces of castor oil will do a similar thing, or adding sugar to a small amount of water and adding that to your lye solution after you dissolve the lye. If you put dry sugar into the lye solution, you'll be fishing out semi-hard candy!
It is an easy matter to make fine soap flakes and chips with lye soap. Rub three day old soap over a soap chipper or vegetable shredder. Stir occasionally while drying. To make powder, first flake or chip the soap and dry in warm oven (150� F.). When thoroughly dry, pulverize it. Soap containing borax makes quick sudsing powder.
One can of lye; mutton or beef tallow 6 pounds; Water 2 3/4 pints; lye solution 90�F.; fat 130� F. All tallow soap is often referred to as "saddle soap" because it is valuable as a cleaner and preserver of leather. Substitution of 1 Ib. of tallow with lard, coconut or olive oil will improve the lathering properties.
One can of lye; coconut oil 4 1/2 pounds; water 2 1/2 pints; lye solution 70� F.; oil 110�F. This soap gives a very profuse but thin lather. Substitute tallow or lard for part of this oil for thicker lather.
To make glycerine soap, add about 6 ounces of glycerine to any soap shortly after the lye solution has been added.
Click here for some other suggestions on making CLEAR Glycerin Soap, offered on the Latherings Soap Forum by Rachael, and sent to me by Jeff Bobeck.
A very high grade soap which in many respects is superior to castile soap can be made as follows: Olive oil 24 ounces; tallow (good grade) 38 ounces; coconut oil 24 ounces; fats 90�F.; 1 can of lye; water 2 pints. Cooled to 90�F.
One can of lye; cottonseed oil 5 3/4 pounds; water 3 pints; lye solution 135�F.; oil 135�F. This oil is a little more difficult to saponify and lye should be added in small portions at a time, obtaining complete saponification before the further addition of lye. The resulting product will be a rather soft soap. For harder soap substitute part of the cottonseed oil with tallow.
Follow recipe for making soap. When mixture thickens add, gradually. 5 to 6 Ib. of pumice stone, emery dust or Tripoli powder and stir until the mixture is thoroughly blended or all the lye incorporated. Pour into mold and cover. Yield: 13 to 15 lbs.
A fine soap for household scouring and for mechanics' hands. Shave 3 Ibs. homemade soap and melt it in three pints of water. Add 3 ounces of light mineral oil. When this is thoroughly blended, allow it to cool to a thick consistency and work in 5 Ibs. of pumice stone or Tripoli powder. Keep tightly covered to prevent paste drying out. Yield: 11 lbs.
For use in washing machines and for washing dishes. Lye hard soap converted into jelly soap is convenient and economical to use. Cut 1 pound of hard soap into fine shavings and add 1 gallon of water. Boil for about 10 minutes then transfer to a suitable vessel to cool. Keep covered to prevent drying out. Jelly soap melts in hot water immediately and makes thick suds.
Cottonseed oil 4 pounds; coconut oil 11/4 pounds, glycerine 3 pints, alcohol 6 1/2 pints; water 7 pints. Dissolve 1 can of lye in a mixture of 3 1/2 pints each of alcohol and water and heat to 125�F. Have the oils at 150�F and add a few ounces of the lye solution, stirring slowly and evenly. When saponification is about complete, add a few ounces of lye solution with continued stirring and repeat until all the lye solution is in. Cottonseed oil is sometimes rather hard to saponify, i.e, to make it unite with the lye, and slight separation of oil might occur after the above procedure if the lye has been added too rapidly. In this case, allow it to stand 24 to 48 hours with occasional stirring. When a perfect mixture is obtained with no separation of oil, add the glycerine and the remaining alcohol and water. Allow to stand for a couple of days and if any sediment settles out, filter or siphon off the clear liquid. Then color and perfume as desired.
One can of lye; fish oil 4 1/2 pounds; water 3 pints; lye solution 80�F.; oil 100�F. Stir well for about 10 minutes and then allow to stand with occasional stirring until combination is complete, then transfer to the molds. This soap is used as a basis for sprays for use as insecticides and fungicides.
One can of Iye; linseed oil 5 3/4 pounds [be sure it's RAW linseed oil, not the boiled type]; water 4 pints; lye solution 90�F.; oil 100�F. Add lye solution in small quantities at a time and get good combination before further addition. This makes a soft soap. Recommended for washing automobiles and furniture.
End of Pennwalt Information
![]()
![]()
|
|
Do you still have questions?For more information on where to find other good soapmaking sites, ingredients and equipment, more recipes and information...go to my Soapmaking Links Page! To learn more from other people's experiences and suggestions...go to the "Soapy Success" Page.
|
This page last updated 8 July 2020.
If you still have questions, please read through the information on the Troubleshooting Help page, MOST Frequently Asked
Questions and Modern Procedures. More can also be learned through the Botched Batches and Soapy Success
pages. Many common problems have already been addressed on the site and
it's difficult for me to keep up with emails these days and get
anything else done. If your question involves my looking up information
that you can also research, or going over numbers and recipe
calculations, I might not respond if in the middle of a project around
our home and garden. I apologize for this, since I've enjoyed my
correspondence with people and don't like to ignore emails of any kind.
Thanks! :-)
![[Bear in Tub Cartoon]](soap/BearBath.GIF)
![[Mylar lining pieces]](soap/Mylar.JPEG)